Connecting Cameras#
Connecting CoaXPress Cameras to the Frame Grabber#
These instructions apply to all CoaXPress frame grabbers.
To connect a camera to the frame grabber:
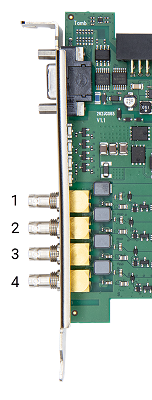
- Plug the cables of your camera into the CoaXPress connectors on the slot bracket of the CoaXPress frame grabber (ports CXP 1, CXP 2, CXP 3, CXP 4, and CXP 5).
-
Plug the CoaXPress cables into the appropriate connectors of the camera:

Info
Basler recommends the following order of ports:
-
Connect camera connector 1 to port CXP 1 of the frame grabber, and proceed accordingly, connecting
- camera connector 2 to frame grabber port CXP 2 (if available),
- camera connector 3 to frame grabber port CXP 3 (if available),
- camera connector 4 to frame grabber port CXP 4 (if available),
- and camera connector 5 to frame grabber port CXP 5 (if available).
-
Connect camera connector 2 to frame grabber port CXP 2 (if available).
- Connect camera connector 3 to frame grabber port CXP 3 (if available).
- Connect camera connector 4 to frame grabber port CXP 4 (if available).
- Connect camera connector 5 to frame grabber port CXP 5 (if available).
Info
CoaXPress always supports Power Over functionality, i.e., the cameras are powered by via the CXP cables
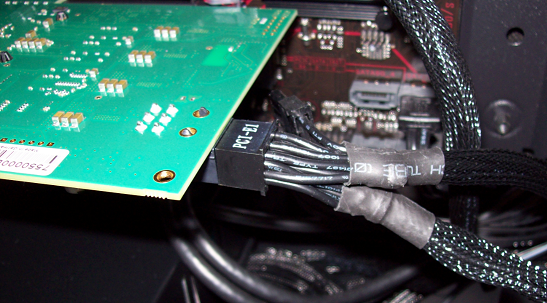
If you want to power the camera via the frame grabber, the frame grabber needs an extra connection to the computer power supply.
When the camera is connected, a green blinking LED on the camera indicates that the camera is powered.
If the LED on the camera isn't blinking, check if you connected the male power connector to the computer power supply.

If the power connector isn't connected:
- Shut down your computer.
- Disconnect your computer from power.
- Connect the female power connector to the frame grabber. If your computer doesn't provide a matching power supply, use a suitable adapter.
- Reconnect and boot your computer.
- If your frame grabber doesn't provide power to the camera, or if your camera doesn't use the power over feature, power the camera.
- Repeat the steps above to connect all cameras in your system.
To configure the camera, open the microDisplay X tool. Instructions for configuring the camera via microDisplay X are available in the microDisplay X User's Manual.
Connecting Camera Link Cameras to the Frame Grabber#
These instructions apply to all Camera Link frame grabbers.
To connect a camera to the frame grabber:
- Plug the Camera Link cables of your camera into the connectors on the slot bracket of the Camera Link frame grabber.
- Plug the Camera Link cables into the appropriate connectors of the camera.
- If applicable: If your camera doesn't support Power Over Camera Link (PoCL), make sure to deactivate PoCL and connect the camera to a power supply.
Activating/Deactivating PoCL Support#
PoCL support is deactivated per default if you are running applets out of applet set version 2.0 (or higher) or an individual applet created with VisualApplets 3.0.6 (or higher).
To activate or deactivate PoCL Support, see Enabling PoCL Support.