Program Window (microDisplay X)#
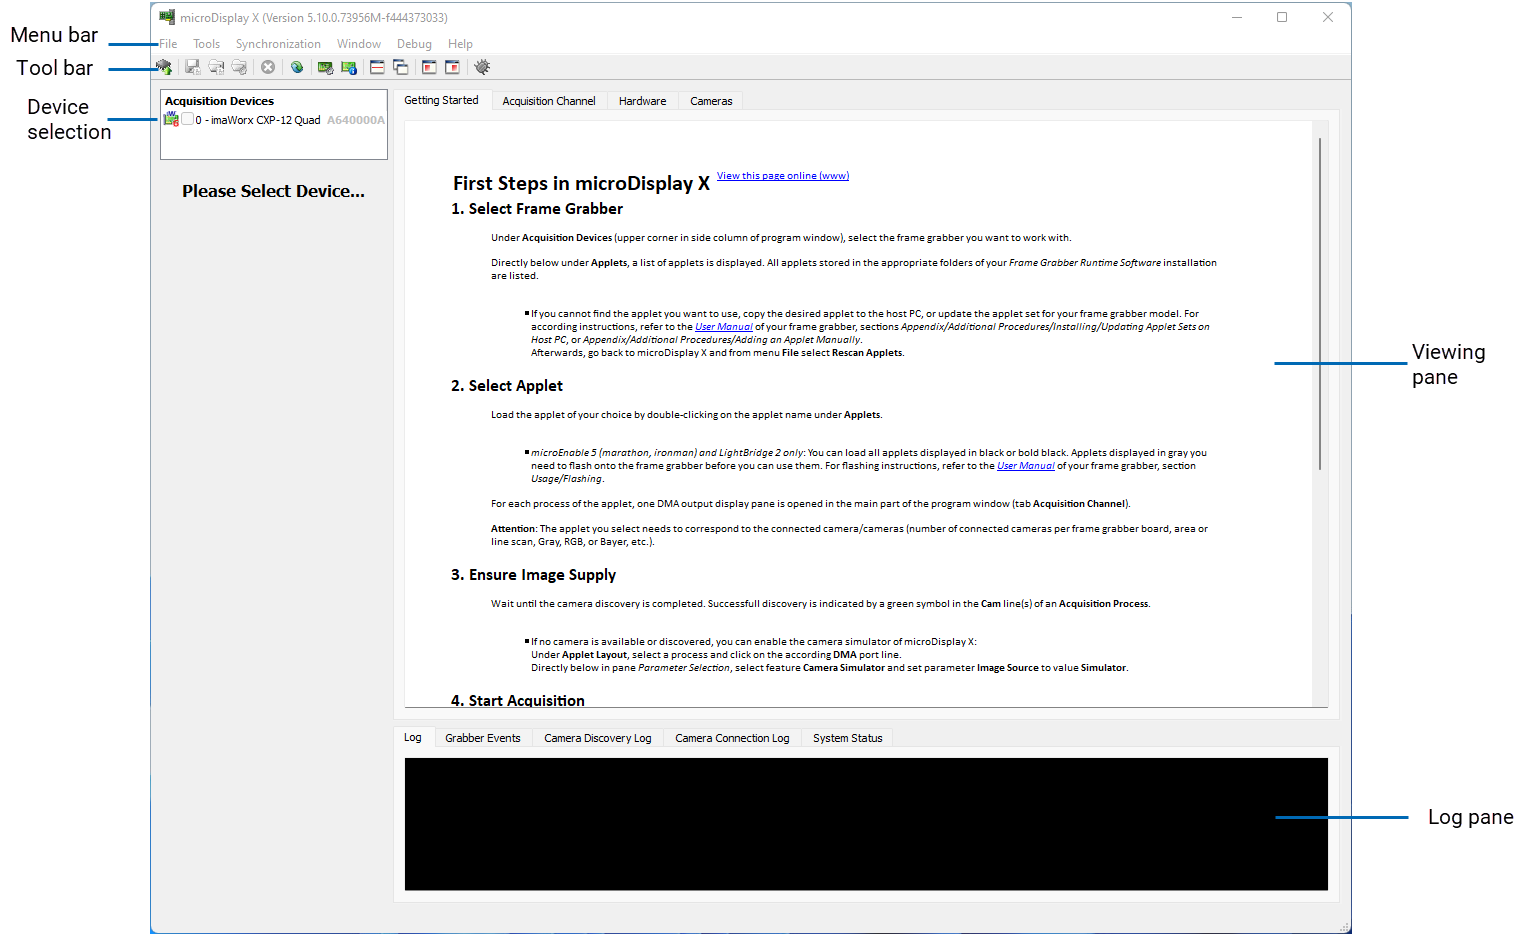
The following program window opens:
Viewing Pane#
In the Viewing pane, you can view various information by selecting the according tab:
- Getting Started: Here, the first steps for using microDisplay X are listed.
- Acquisition Channel: Here, you can view the images that are being grabbed (during image acquisition) or that have been grabbed (after acquisition has been stopped).
- Hardware: Here, you get information on the connected frame grabber boards and on the installed driver and firmware versions. If you use a CoaXPress camera, you can also find information on the detected link configuration (subtab Link Configuration).
- Cameras: If you use CoaXPress cameras, you can configure your cameras here, using the GenICam interface of the frame grabber runtime environment.
Log Pane#
The Log pane displays various information:
- Log: If an error occurs, the according error messages are displayed here.
- If you switch to another tab in the logging frame while an acquisition is running, the number of messages you missed after leaving the Log tab is displayed directly on the tab.
- Grabber Events: Lists events on the frame grabber that have occurred. (See here for details.)
- To read individual lines of the log while the logging is taking place, you can stop the running through of lines. Right-click directly on the running lines and in the context menu, click Auto Scrolling Enabled to stop auto scrolling.
- If you switch to another tab in the logging frame, the number of grabber events you missed after leaving tab Grabber Events is displayed directly on the tab.
- Camera Discovery Log: Lists all events that occur during link configuration and camera discovery.
- Camera Connection Log: Lists all events that occur during GenICam communication.
- System Status: Displays the current system status:

Configuring the GUI Settings#
You have various options to change the display of information in the graphical user interface of microDisplay X. Refer to Setting User Preferences for details.
Applet Pane#
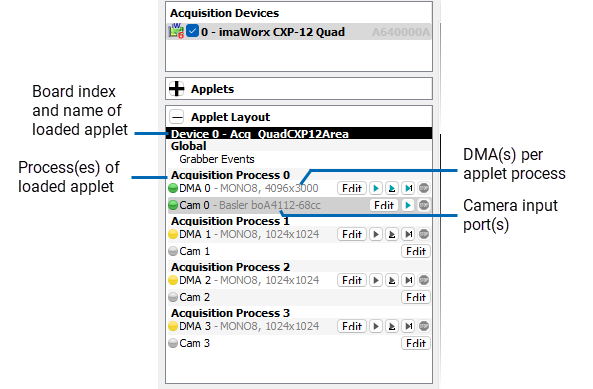
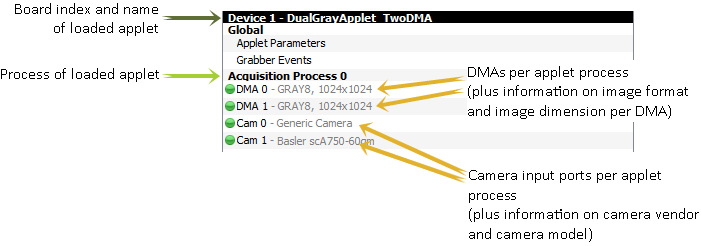
After loading an applet, the Applet Layout pane states:
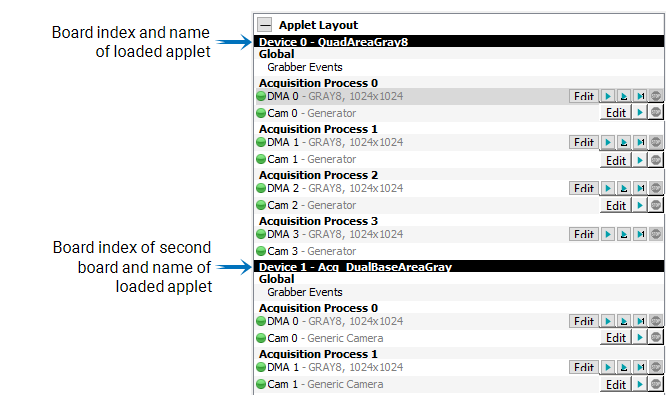
- The board index of frame grabber board together with the applet that is loaded onto the board
- All processes of the loaded applet
- For each applet process:
- All camera input ports of the process
- All DMA output ports of the process
- On the Cam lines, a tooltip provides you with information on the connected camera. You can change the connected camera by clicking the Edit button in the camera line.
Example 1: Applet with 4 processes. Each process has 1 camera input port and 1 DMA output port:
Example 2: Applet with 1 process. The process has 2 camera input ports and 2 DMA output ports:
Loading Multiple Applets#
In microDisplay X, it is possible to load multiple applets (one applet per plugged frame grabber board). The Applet Layout pane lists all applets you have loaded (one below the other):
Display by Source Type#
You can switch the display so that the camera input and DMA output ports are displayed by source type:
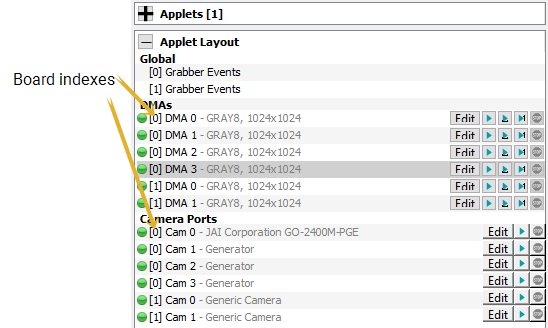
Which DMA/camera belongs to which frame grabber board you can see by the board index that is displayed directly after the status display.
To get the display sorted by source type:
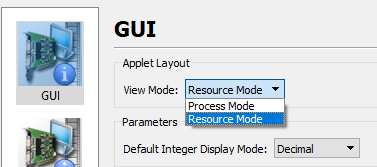
- From menu Tools, select Settings.
-
In the dialog that opens, under GUI, Applet Layout, set View Mode to Resource Mode.
