Configuring the Camera (microDisplay X)#
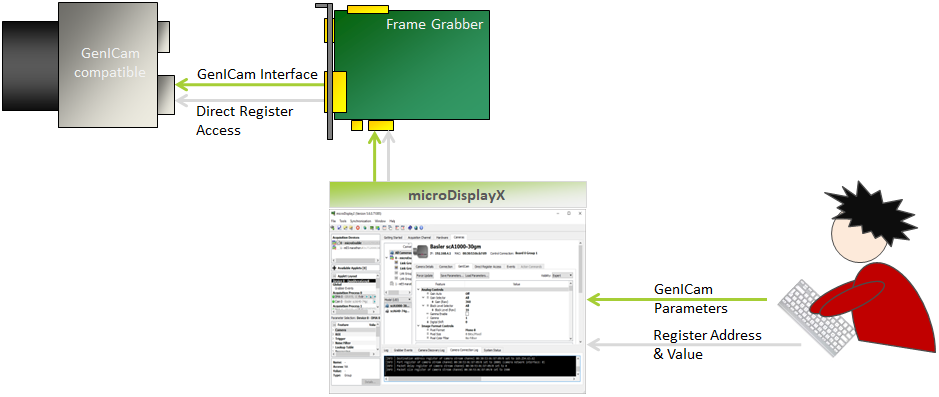
In addition, you can use microDisplay X to access camera registers directly. This might be helpful, for example, when you want to access a camera register that holds content not defined by the GenICam standard.

Configuring the Camera via GenICam Interface#
Requirements:
- Your camera supports the GenICam standard.
- Camera and frame grabber are plugged and powered (camera may be powered by the grabber via power over).
- The Framegrabber SDK has been installed.
To adjust the camera settings:
- Start microDisplay X.
-
Select the frame grabber you want to work with from the list under Acquisition Devices (left upper corner).
Immediately, a list of applets is displayed in the pane below.
Info
If there are no applets displayed, install the applet set for your frame grabber model on the host computer as described in the User Manual of your frame grabber. After installation, select File -> Rescan Applets in microDisplay X.
-
Select an applet out of the applets list.
-
Double-click the applet name to load the applet.
Wait until the camera is discovered. A discovered camera is marked by a green disk.

-
Switch to the Cameras tab.

-
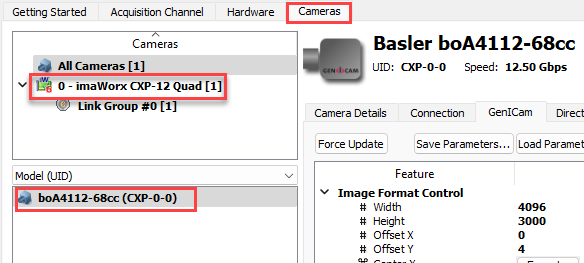
In the Cameras tab, select the frame grabber that is connected to the cameras you want to configure. The cameras connected to this frame grabber are listed in the Model (UID) panel below:

-
Select a camera in the Model (UID) panel to work on this specific camera.
-
Go to the GenICam tab to configure the camera.

-
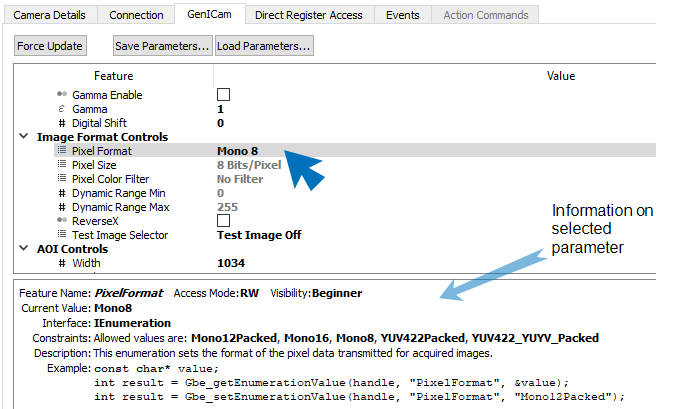
Select a user role. You can choose between three display modes (right upper corner): Beginner, Expert, and Guru. If you set the display mode to Beginner, you can only see and alter the most important camera settings. In Expert mode, most settings are enabled and in Guru mode, all possible settings can be seen and adapted.

-
Click a parameter value to change it. Use the arrows (on the right of the value field) or type directly.

You can find more information about each parameter in the right hand bottom panel as soon as you click the parameter:

-
Click the Force Update button if you don't see the changes in your settings immediately.

-
Set all camera parameters as desired.
Alternatively, you can load a camera configuration you have saved to file before. To load an existing camera configuration, click Load Parameters. -
Optional: Click Save Parameters to save the camera configuration.
The camera configuration is stored in a *.txt file.
-
Repeat steps 4–13 for all connected cameras.
Directly Accessing Camera Registers#
You can access camera registers directly, without using the GenICam layer. You have direct read and write access. This is useful if you want to access a camera register that holds content not defined by the GenICam standard.
Requirements:
- You know the addresses of the registers you want to access.
To get read/write access to a camera register:
- Start microDisplay X.
-
Switch to the Cameras tab.

-
In the Cameras tab, select the frame grabber that is connected to the cameras you want to configure. The cameras connected to this frame grabber are listed in the Model (UID) panel below:

-
Select a camera in the Model (UID) panel to work on this specific camera.
-
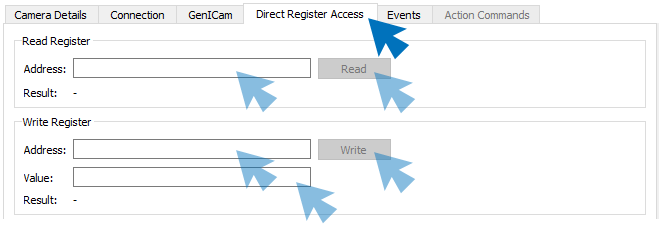
Switch to the Direct Register Access tab to configure the camera.

-
Access the desired registers:
- Read Access:
- Under Read Register, enter the address of the register into field Address. Click the Read button to read the value currently stored in the register.
- Write Access:
- Under Write Register, enter the address of the register into field Address.
- Enter the value you want to write into the register into field Value.
- Click the Write button to write the new value into the register.
- Read Access: