OCR vTool#
The main goal of optical character recognition is to identify objects or to read specific information on objects in the images, e.g., best before dates, serial numbers, or product labels.
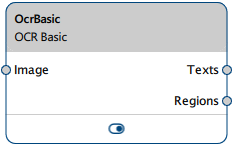
The OCR vTool accepts an image via the Image input pin. The text and the segmented regions of the resulting words are output via the Texts and Regions output pins.
To buy a license for the OCR vTool, visit the Basler website.
运作原理#
In a specified region of interest, the OCR vTool segments the text into words and individual characters and classifies each character, i.e., as a letter, number, or special character, e.g., a punctuation mark.
Despite its name, the OCR vTool doesn't read single characters, it reads words. The minimum word length is 2 characters.
If your text stretches across multiple lines, every line is considered as one word at least. If there are large gaps between words within a single line, the algorithm considers these words distinct entities.
A 4-step wizard guides you through the configuration of the vTool. It gives you instant feedback regarding the effects your settings have. Refer to the following sections to learn more about the individual steps.
Preview Area#
The preview area is a helpful tool to immediately check any changes you make in the vTool's settings.
Above the preview area are two buttons, one for toggling the display of bounding boxes around segmented regions and recognized characters and one for highlighting of regions.
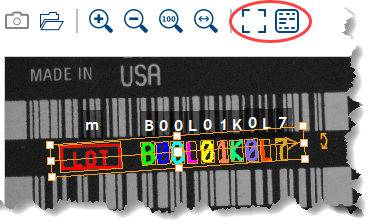
Displaying Bounding Boxes and Characters Recognized#
This button allows you to show/hide bounding boxes around the segmented regions:
Above each character recognized, the resulting character is displayed. This allows you to quickly verify whether the recognition worked correctly.
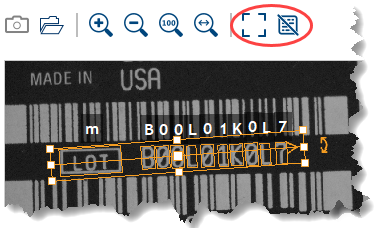
Highlighting Regions#
This button allows you to highlight the segmented regions:
This makes it easier to see whether a character has been recognized completely or only partially. This is helpful for fine-tuning segmentation settings, e.g., the contrast.
Step 1: Initial Settings#
Begin by loading an appropriate teaching image, either from disk or by using a live camera image. The teaching image must be representative of the inspection images regarding the following aspects:
- Position and orientation of the text
- Size of the characters (if you're specifying the character dimensions manually)
In automatic mode, the characters are allowed to vary in size.
Basler recommends using a number of different sample images when configuring the OCR vTool. That way, you can better assess the image quality of the text and check the segmentation results as well as the confidence of the candidates. These sample images should ideally cover the complete character set that you expect to occur in the application.
Rectangle Settings#
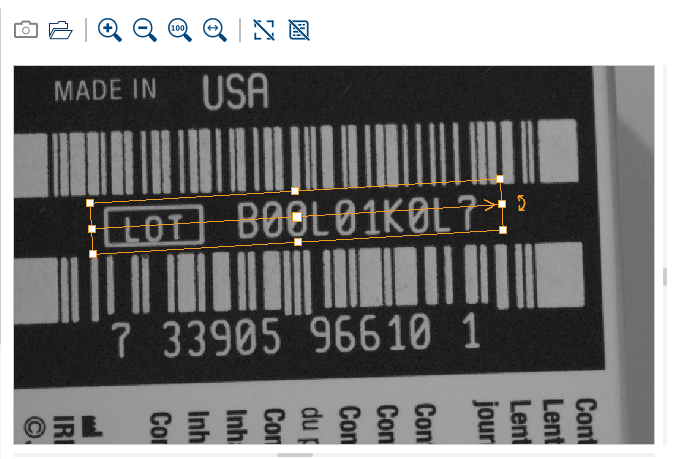
Once you've loaded an image, a rectangle is displayed in the image. This is used to mark the region in which your text is located. You can adjust its position, orientation, and size by dragging the handles of the rectangle or by entering values manually in the input boxes to the left of the preview area.
The region must only contain the text you want to read as the OCR algorithm can't distinguish between characters and unwanted image elements (clutter) or noise. If clutter or noise can't be avoided completely, you should take appropriate measures like adding postprocessing steps or adding other OCR vTools to define multiple text regions. Also, don't fit the rectangle too tightly around the text as the text may move slightly in all directions from image to image.
When defining the region, observe the arrow running through the region rectangle. This indicates the reading direction. Text running in other directions can't be read.
For the OCR vTool to work in a stable manner, the orientation of the text should be more or less the same across all images you want to process. Minor deviations, a few degrees, are acceptable. Basler recommends positioning the camera so that the text can be read from left to right. If your text has a different (but constant) orientation, position the region rectangle accordingly while making sure that the arrow is pointing in the reading direction of the text.
If the position of the text varies a lot and the background space around the text is limited, you should add image alignment as a preprocessing step to ensure stable orientation and position of text.
This is a sample image where the rectangle has been rotated slightly to follow the text.
Font Settings#
Choose a font and a corresponding character set that fits the text in the image. Usually, this is determined by the specification of the application or the printing process.
The following table lists the available fonts and shows examples of their appearance:
| Font Name | 描述 | Appearance |
|---|---|---|
| Standard Mixed | Different fonts, with or without serifs, often used in documents |  |
| Standard Sans-Serif | Different office fonts without serifs, often used in documents |  |
| OCR-A | As defined in the OCR-A standard |  |
| OCR-B | As defined in the OCR-B standard |  |
| Dot Print | Different dot print fonts, produced by dot printers |  |
| Pharma | Font without serifs used in the pharmaceutical industry |  |
| SEMI | Font used in the semiconductor industry as defined in the SEMI standard |  |
| Handwritten | Handwritten numbers |  |
Depending on the font, different character sets are available. A character set can include some or all of the following subsets:
- Uppercase letters
- Lowercase letters
- Numbers
- Special characters
The special characters that can be recognized vary by font.
The following table lists the characters that can be recognized with each font:
| Font Name | Uppercase letters | Lowercase letters | Numbers | Special characters |
|---|---|---|---|---|
| Standard Mixed | 是 | 是 | 是 | - = + < > . # $ % & ( ) @ * e £ ¥ |
| Standard Sans-Serif | 是 | 是 | 是 | - / + . $ % * e £ ¥ |
| OCR-A | 是 | 是 | 是 | - ? ! / { } = + < > . # $ % & ( ) @ * e £ ¥ |
| OCR-B | 是 | 是 | 是 | - ? ! / { } = + < > . # $ % & ( ) @ * e £ ¥ |
| Dot Print | 是 | 无 | 是 | - / . * : |
| Pharma | 是 | 无 | 是 | - / . ( ) : |
| SEMI | 是 | 无 | 是 | - . |
| Handwritten | 无 | 无 | 是 | 不适用 |
Rejection Class#
A rejection class allows you to deal with ambiguous results, i.e., characters that the vTool couldn't recognize. These characters are classified as rejected characters and are represented by different question mark icons depending on where they appear in the pylon Viewer.
This icon is used in the settings dialog:
This icon is used in pin data views:
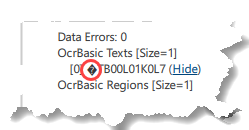
Use a rejection class to better assess the confidence of a result. Among others, the confidence reflects the print or image quality of the character in addition to how well the character fits the trained font.
If the result with the highest confidence value is in the rejection class, this section of the image can't be assigned unambiguously to a character. This may be caused by smudging in the image or an incompletely printed character. If this occurs a lot, it is an indication of poor image quality. In that case, you could either try to improve the quality of your images or declare such characters unreadable in a postprocessing step. With this approach you are on the safe side as it allows you to instead choose a character with a lower confidence.
If your classification results are often ambiguous, you could consider using a regular expression to perform word correction.
If you want to always return a character, disable the Allow rejections option.
To find the right setting for you, try enabling and disabling the option and observe how the results in step 4 differ regarding the candidate list and recognized words.
Step 2: Character Dimensions#
The segmentation of the characters relies on some assumptions regarding the characters' dimensions, i.e., the width, height, and stroke width. The OCR vTool supports an automatic algorithm to derive these dimensions directly from the image data. Alternatively, you can specify the desired ranges of the dimensions manually. A character height between 20 to 30 pixels is an appropriate size range but you can also specify larger character sizes. Characters below 20 pixels can't be recognized reliably anymore.
信息
If the size of the characters varies within the text or across different images, use the automatic mode. That way, all characters regardless of size can be read.
A typical use case for manually specifying the dimensions is if the automatic mode fails to exclude clutter in the segmentation. In that case, manually specifying the dimensions may eliminate unwanted image elements.
Step 3: Segmentation Settings#
对比度#
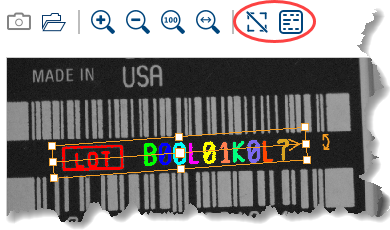
The segmentation of the characters in the image is based on a thresholding mechanism with a specified minimum contrast value as the threshold. Adjust the minimum contrast and observe the segmentation result in the preview area. Enable the region segmentation view by using the toggle button above the preview area for improved visualization.
Select a minimum contrast setting at which all characters are segmented and read correctly. Don't set the minimum contrast too low as this may lead to the detection of unwanted clutter.
The available fonts are trained and meant to be used only for dark characters on light backgrounds. If this Polarity setting fits your application, use the Dark on light option.
If your application involves light characters on dark backgrounds, you have to use the Light on dark option. In that case, the image is inverted internally in a preprocessing step.
If your application involves text that is lighter or darker than the background, select the Both option. However, the OCR vTool can't read text with mixed polarities. The polarity must be the same within a text region.
Spacing#
Words can also include special characters like dots, commas, hyphens etc. The majority of them are punctuation marks. The hyphen and the equal sign, however, are considered separators.
In some applications, you may want to read these characters. In that case, select a character set that includes special characters and enable the Punctuation and Separators options.
In other applications, you may prefer reading the words without punctuation marks or separators, e.g., when reading dates where you are only interested in reading the numbers. Therefore, select a numbers-only character set and disable the Punctuation and Separators options.
In terms of spacing, you also have to consider the distance between individual characters. To successfully segment the text into individual regions, there must be a substantial gap between characters. In practice, though, characters are often too close together making it hard to distinguish between them. If you find this to be the case in your application, enable the Separate touching characters option.
Dot Print#
The Dot Print font differs from all other font types as its characters are formed exclusively by individual dots and not continuous strokes. In order to read dot print text, the OCR vTool offers dedicated segmentation and classification options. To make these options available, you have to select the Dot Print font in step 1 of the wizard. Normal dot print characters with sufficiently big gaps between the characters and a compact dot print scheme can be read straightaway.
In case of dot print texts where the gaps between the characters are similar or smaller compared to the gaps between the dots within a character, Basler recommends enabling the Tight character spacing option.
For successful segmentation, you also have to consider the gaps between the dots of a character. In a compact dot print scheme, the dots lie quite close together with no variation in the size of the gaps. Such characters can be read well by enabling the Auto option, which is the default setting. In that case, an internal, automatic mode is used.
If, however, some of the gaps are bigger than others, the segmentation of a single character may fail and the character is split up into more than one region. In such situations, it may help to manually specify the maximum allowed gap between dots using the Max. dot gap option. Doing so may increase the processing time, though.
Step 4: Results#
The last step of the wizard shows you a table with the potential candidates for each character position in a word together with a confidence value. If you click an entry in the table, the respective bounding box in the preview area is selected and vice versa.
By expanding the drop-down list, you can reveal all candidates. They are listed in descending order of confidence. This allows you to assess the overall confidence of the character classification and shows you potential alternatives.
信息
The confidence is a value between 0 and 1. It is an indication of how well the character recognition has worked. Very good classification results often have confidence values above 0.99. Confidence values below 0.9 or 0.8 may indicate an unreliable classification.
Below the table is the Text Recognized area. Here, the complete text that has been recognized is displayed in compact form.
Regular Expressions#
A typical challenge faced by OCR is the ambiguity between the characters 0, O, and o. Explicit OCR fonts like OCR-A or SEMI are designed to distinguish between 0 and O but other fonts are not. You can solve this challenge with the help of a regular expression.
Regular expressions allow you to perform word correction. Word correction means that instead of just taking the candidates with the highest confidence other candidates are taken into account as well to try to find a combination of candidates that fits the regular expression.
To do this, enter as many regular expressions as there are words in the text in the input field above the results table. Separate the regular expressions by single spaces.
Example: Assume you want to read a best before date, e.g., "03/2026". The main intention is to read the numbers of the date or time. Assume also that special characters or letters are to be read as well. In that case, you would select a character set containing numbers, letters, and special characters. By using the regular expression "(0[1-9]|10|11|12)/202[4-9]", you're able to read the slash as well while maintaining the MM/YYYY date structure.
信息
Regular expressions can't correct the word length by adding or eliminating characters. The regular expression must fit the word length, and the word length must stay the same across all images.
Performing word correction of long words may increase processing time.
配置 vTool#
To configure the OCR Basic vTool:
-
In the Recipe Management pane in the vTool Settings area, click Open Settings or double-click the vTool.
The OCR Basic dialog opens. -
拍摄或打开图像。
Either use the Single Shot button to grab a live image or click the Open Image button to open an existing image.
Once an image has been loaded, the text reading process starts immediately and the results are displayed in the preview area.
At the bottom of the window, the recognized characters are shown, with words separated by spaces. As space here is limited, you may not see the whole text. This is just an indication of how many characters have been recognized. The complete text will be shown in step 4 of the wizard.
有关更多信息,请参阅 Step 1: Initial Settings.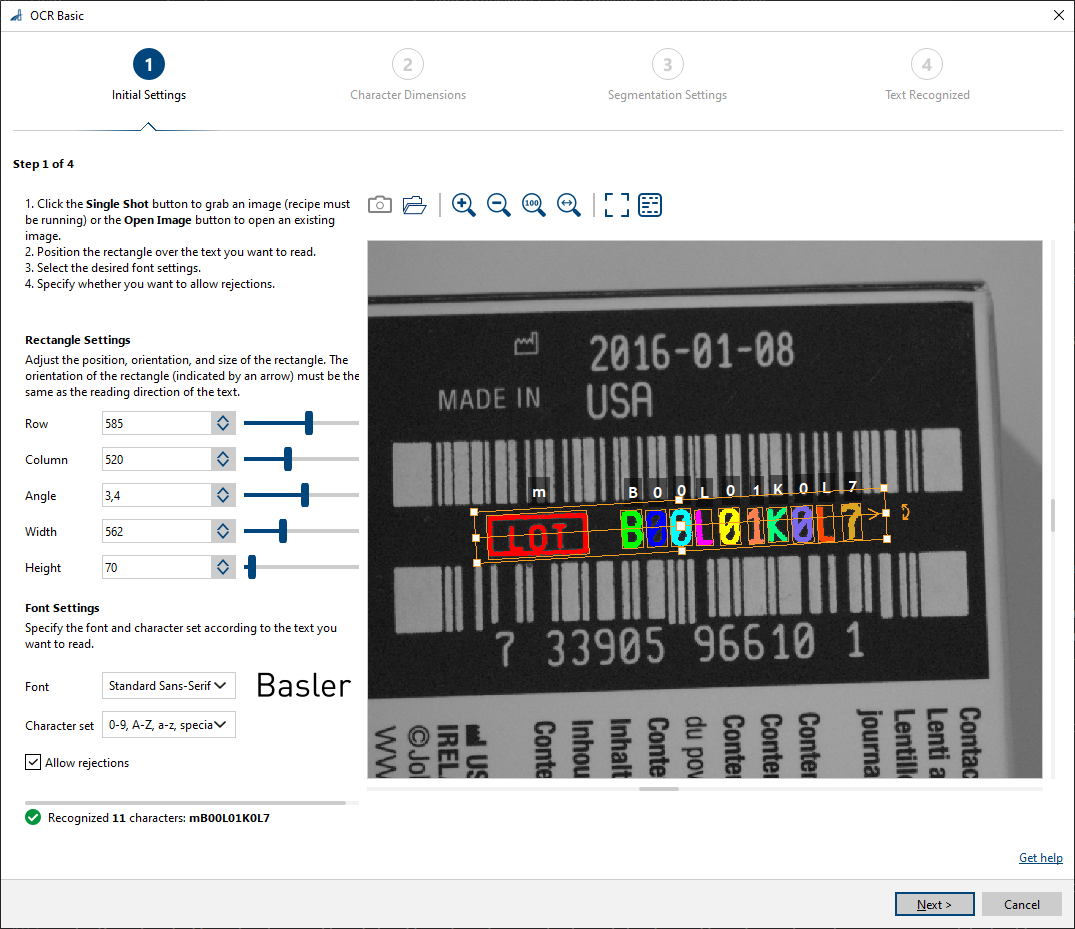
-
In the Rectangle Settings area, define the text region by entering the values manually.
Alternatively, you can use the handles of the region rectangle in the preview area to move, resize, and rotate it to fit the part of the image in which you want to read text.
The arrow in the rectangle must point in the reading direction of the text. -
In the Font Settings area, configure the following options:
- Font type
- Character set
- Rejection class
-
单击 下一步.
步骤 2: OCR Basic 对话框即打开。
有关更多信息,请参阅 Step 2: Character Dimensions.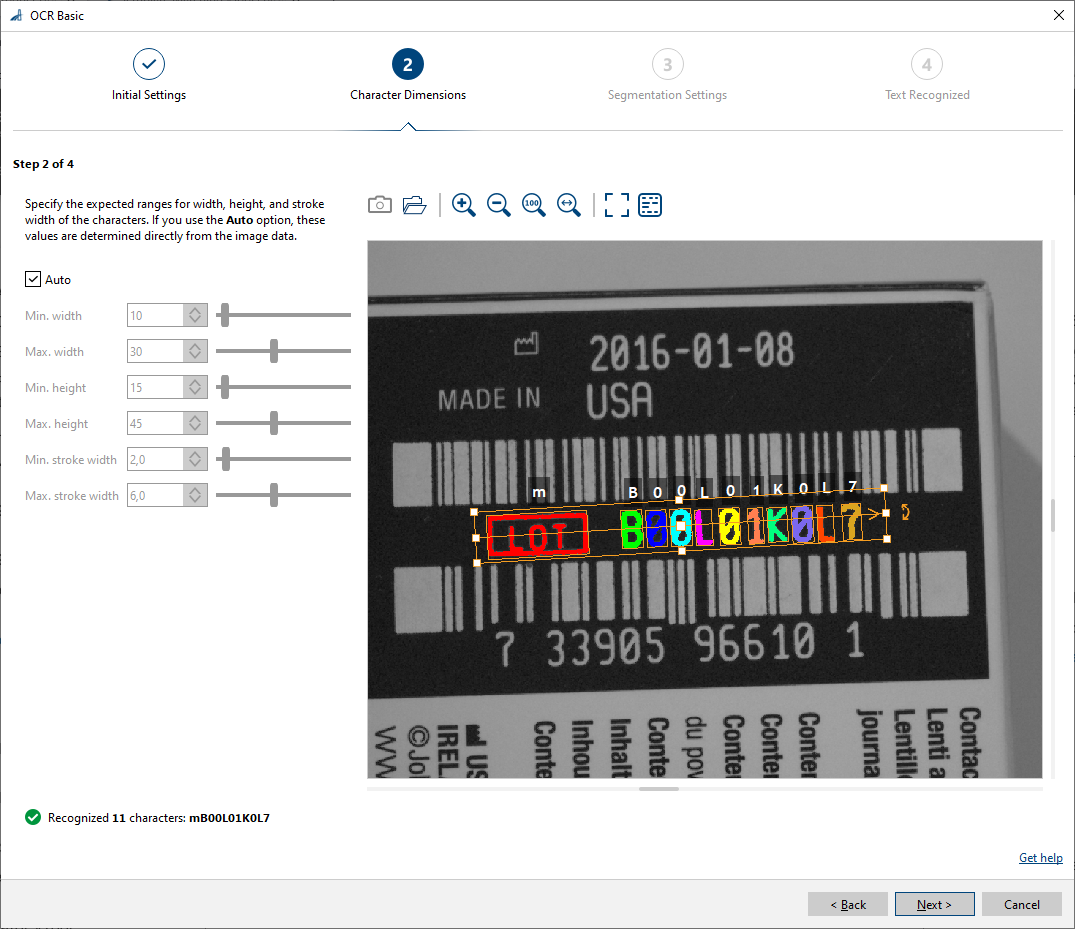
-
Decide whether to leave the default automatic mode for detecting the character dimensions enabled. If you want to specify the dimensions manually, deselect the Auto option and enter the desired ranges for the character width, height, and stroke width.
-
单击 下一步.
Step 3 of the OCR Basic 对话框即打开。
有关更多信息,请参阅 Step 3: Character Settings.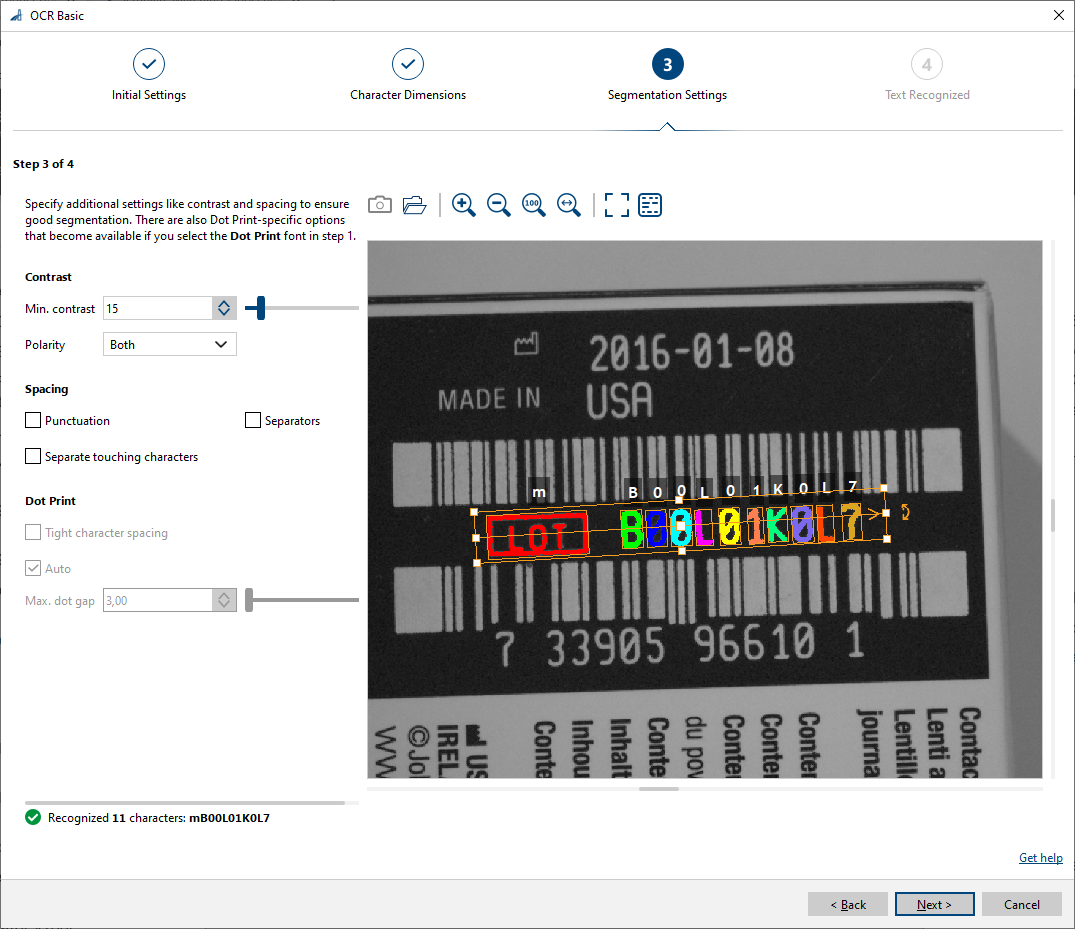
-
Adjust contrast and polarity according to your application.
-
Select the spacing options according to your application.
-
If you have selected the Dot Print font, specify the options as required.
-
单击 下一步.
Step 4 of the OCR Basic 对话框即打开。
有关更多信息,请参阅 Step 4: Results.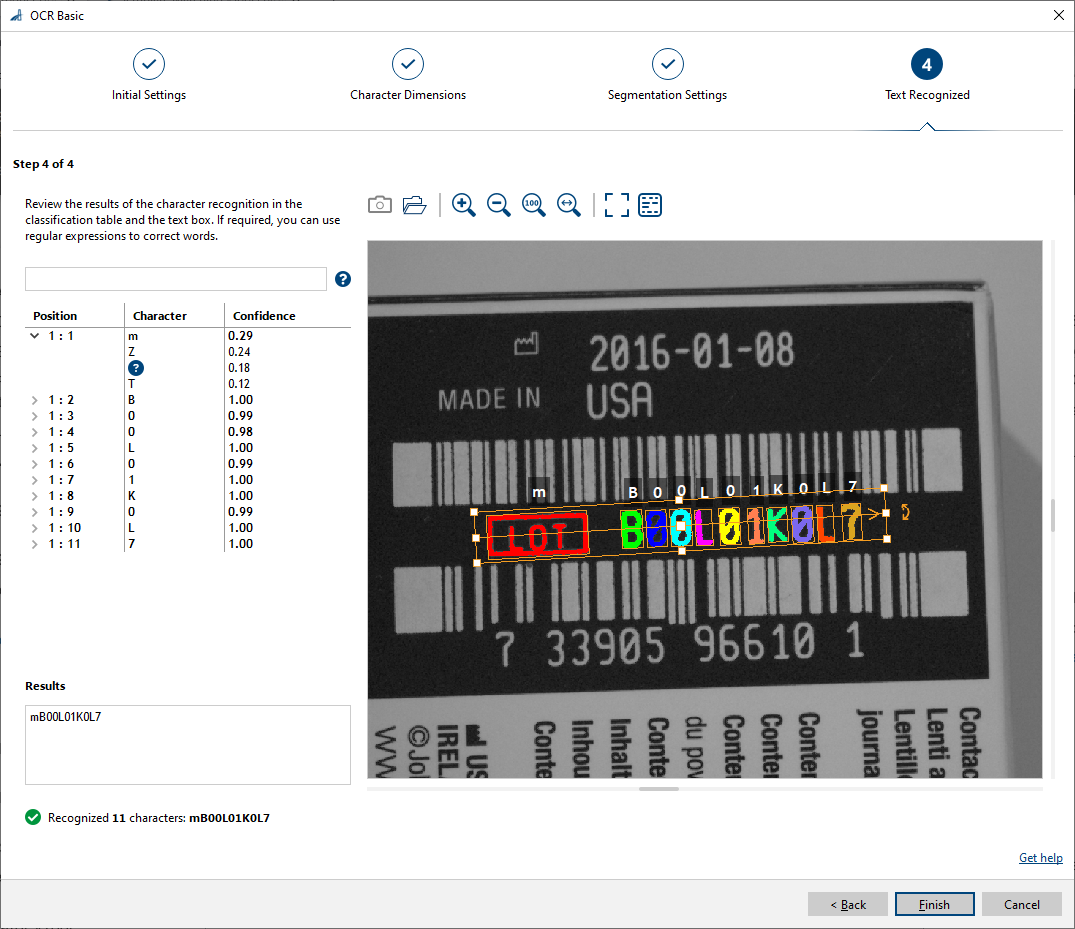
-
Review the results of the character recognition in the classification table and the text field.
In the table, you can expand each position to open the alternative classification results. You see the classified characters and their confidences.
If the detail view options are enabled, you can select a character in the table and the bounding box of the corresponding character is highlighted in the preview area; vice-versa, you can click a character region in the preview area to see the corresponding character in the table. -
If required, enter regular expressions to perform word correction.
Enter one regular expression per word. Separate expressions by single spaces. -
Inspect the resulting words in the Text Recognized field.
-
Click Finish to finish the setup process.
You can view the result of the OCR Basic vTool in a pin data view. Here, you can select which outputs to display.
输入#
图像#
直接从 Camera vTool 或从输出图像的 vTool(例如 Image Format Converter vTool)接受图像。
- 数据类型:图像
- 图像格式:8 位到 16 位单色或彩色图像。彩色图像在内部转换为单色图像。
输出#
文本#
Returns the recognized text strings.
- 数据类型:字符串数组
区域#
Returns the regions of the recognized text.
- 数据类型:区域数组