锐化指示器#
运作原理#
锐化指示器可测量当前图像某一部分的锐度。此部分称为锐度 ROI。您可以根据需要调整其大小和位置。
为了测量锐度,锐化指示器会评估图像的边缘。如果颜色或亮度或两者均具有强烈的对比,则认为边缘锐度较高。根据经验,聚焦良好的图像边缘锐度要更高。
为了在使用锐化指示器为相机镜头聚焦时获得最佳效果,请使用对比度高的测试图,例如 ISO 12233 测试图。
使用锐化指示器聚焦镜头#
To open or close the Sharpness Indicator pane, click the Sharpness Indicator icon in the toolbar:
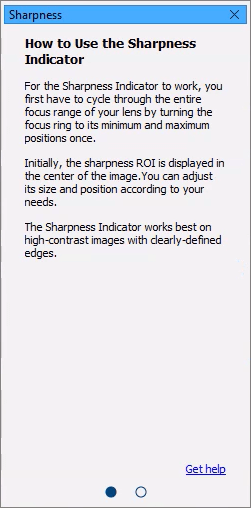
The first page of the Sharpness Indicator opens:

聚焦镜头:
- 在您的环境中设置相机。
理想情况下,请使用对比度高且边缘清晰的测试图。测试图与相机的距离应与预期目标物体/场景与相机的距离大致相同。照明条件也应与实际工作条件相似。 - 打开锐化指示器窗格。
- 打开相机并开始连续图像采集。
此时将打开一个图像窗格,在图像中心显示锐度 ROI。 - Optional: Adjust the sharpness ROI if required.
If you're not using a test chart but your actual target object/scene, you may want to focus on a particular area of the image or you may need a larger or smaller sharpness ROI.
To return to the sharpness ROI to its original settings, right-click the image and then click Reset Sharpness ROI. - 将镜头的对焦环转到最大和最小位置各一次。
您可以明显看到锐化指示器窗格中显示的变化。 - 慢慢转动对焦环,直到锐化指示器显示 100%。
提示#
为了获得更好的效果,请尝试以下操作: